Mastering the zipped pouch
Hello fellow sewers
I’ve spent hours and hours trying to get this absolutely perfect and am now happy to share it with you. Watch this space for future workshops making these lovely zipped pouches.
 This is a largish pouch to use to transfer all that essential stuff from one handbag to another. It’s big enough for all those bits and pieces – mine currently contains a mini hairbrush, some plasters, an emery board, hand gel, Paracetamol, Ibuprofen, a pen, a pencil, a notebook, my diary (yes, I still use a paper one), tissues, business cards and of course the absolutely essential iPhone. I made a cosy zip pocket on the outside of this one for my new phone.
It has turned out to be a little bit on the big side but is my prototype. I will try out some slightly smaller ones next week. The finished size, using an A4 sheet of paper as a template, is 27cm x 19cm.
So, instructions for a zipped pouch with an extra zip pocket:
Step 1

Cut two identical rectangles of fabric, one for the back of the pouch and one for the backing piece of the front. The front is double fabric, simply because of the pocket, and the back is single.
Cut a third rectangle with an added 3 cm on the long edge – this is the front piece, and the side that will have the extra zip pocket.
Step 2


Fold the font piece in half lengthwise and sew 1.5cm from the fold with the longest stitch on your machine. Cut on the fold and press the seam open.
Step 3
Insert the zip for the pocket.
Make sure the zip is shorter than the width of the front by 4cm. Place the zip face down on the wrong side of the fabric, lining up the teeth with the seam. Tack in place so that you can see the tacking on the right side. Sew (on the right side) with a zipper foot. Take care going over the ends of the zipper. If necessary, use the hand wheel to go over the teeth very, very slowly. Once sewn, unpick the seam with a stitch ripper.
(Note: On my next one I think I will use the same method as I’m going to show you for the top zip, so that you can SEE the zip. I will post again when I make the adjustments.)
Step 4
I added a nice soft piece of fleece fabric to the bottom half of the front piece to make the pocket nice and cosy for my new phone so that it won’t get scratched. Just sew one row of stitching parallel to the zip to hold it in place.

Step 5
Place the A4 inner piece, WRONG sides together onto the front zippered piece and tack or machine sew around all four sides. Also, add a row of stitching on the top half, close to the zip.

Step 6
Now for the top zip, the trickiest bit so far.
First, prepare your zip and tabs.
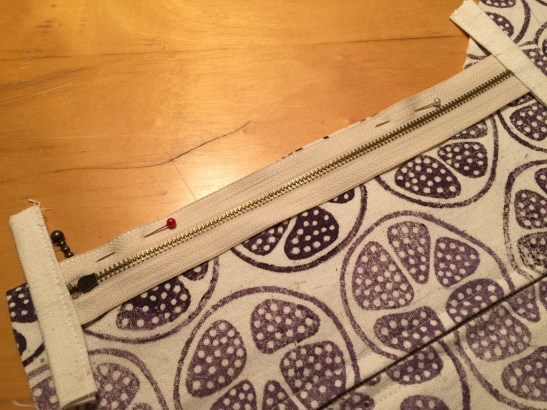
Cut your zip to 4cm shorter than the top edge of the pouch. If it’s a metal zip, don’t use your best scissors! My picture is not quite right. As I say, it needs to be a whole 4cm shorter, i.e. 2cm each end. This measurement is crucial to having a neat finish.

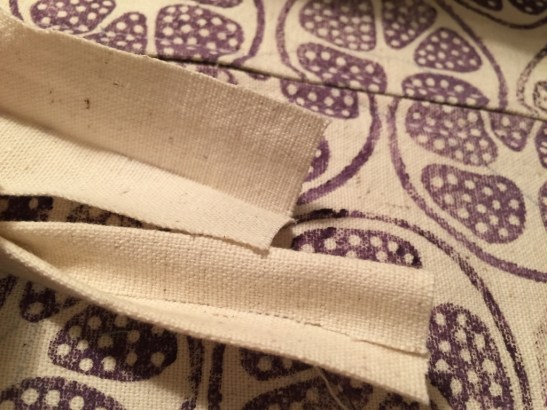
To make the tabs for the ends of the zip, cut two pieces of fabric approximately 5 cm x 9cm. Fold each piece in half lengthwise, press, then unfold. Fold each edge towards the middle crease and press. You’ll end up with the v-like pieces shown in the picture below.
Step 7
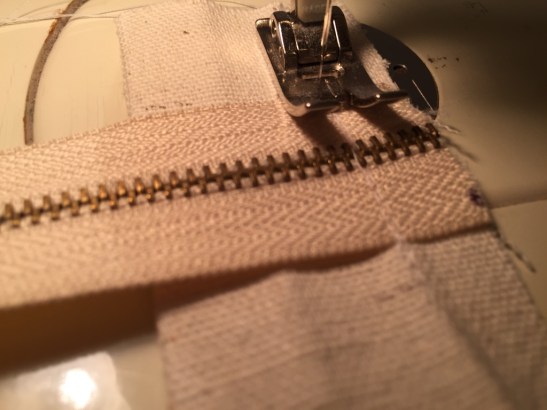
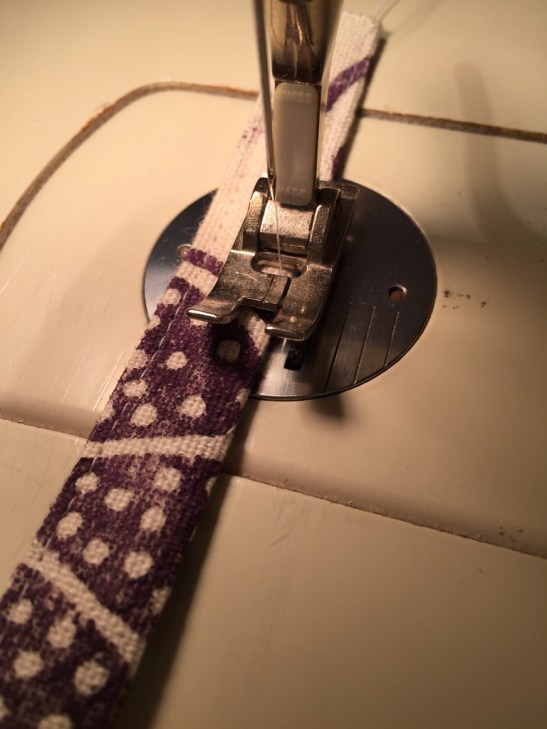
Open up the strip and line up one long-side raw edge of the tab with the raw edge of the zip, right sides together. Pin in place and stitch along the first crease. Again, use the hand wheel to slowly sew over the zip’s teeth.
Wrap the tab around the edge of the zip. Slip stitch or machine stitch the other side. (I machined mine).

Do the same with the other end.
Your zip, including tabs should now be around 1.5cm shorter each side than the width of your pouch, i.e just a mm or two short of the seam allowance.
Step 8
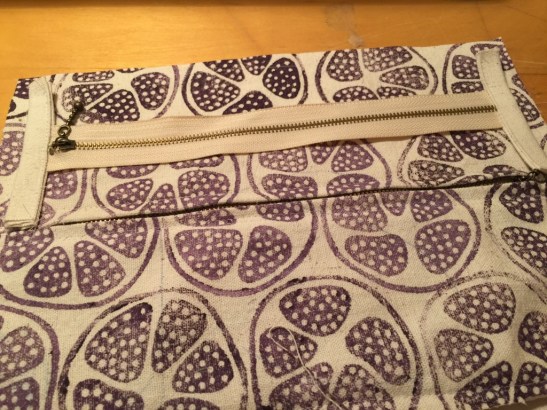
With RIGHT sides together, pin the zip to the top edge of the front of the pouch. Sew close to the zip with a zipper foot. Do the same with the back.


So far, it should look like this.

Press away from the zip to create a nice clean finish.
Step 8
Make the pull tab and wrist band.
Cut two pieces of fabric, each around 5cm x 14cm and 5cm x .45cm. Fold each in half lengthwise, press and press into the middle (exactly as you did for the tabs). Then topstitch each edge.
Step 9
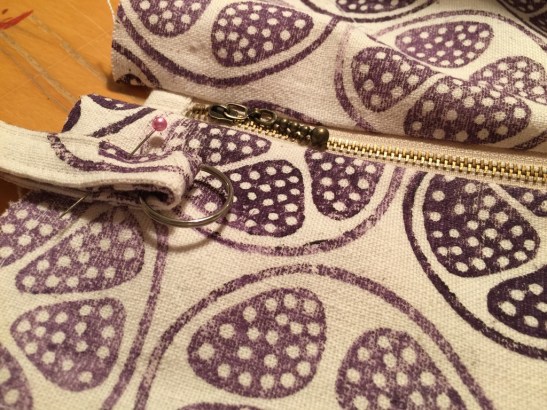
Fold the smaller piece in half, enclosing your D-ring. Place, LOOP-side inwards approximately 1.5 cm down from the top. I usually do this at the opening end of the zip, but it’s personal preference.
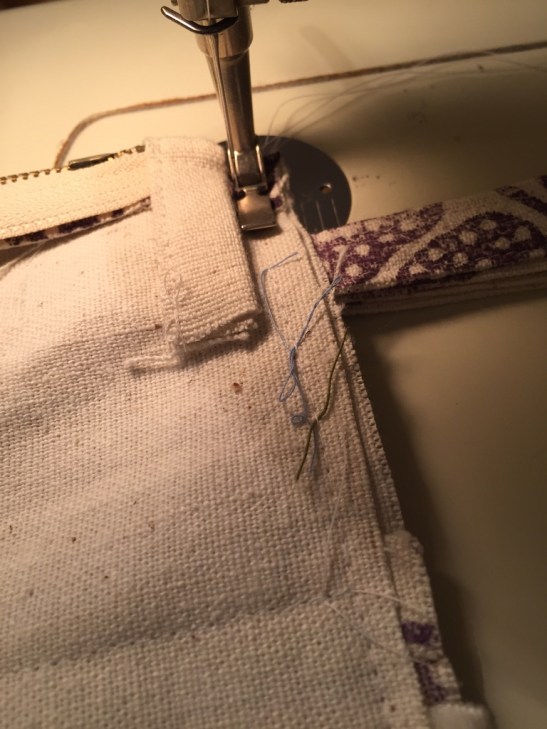
Place the front and back RICHT sides together, and sew the seam all the way around. Take care to be as accurate as possible at the top edges and to line front and back up carefully, and to start your stitching 1-2 mm away from the zipper tabs. I use a zipper foot so that I see exactly where I am in relation to the zipper tabs.
Note: It is easier to be accurate if you sew down the sides first (each time starting at the top).
Step 10
Loop the wristband through the D-ring and secure by stitching or riveting if possible.
Step 10
Trim off excess seam allowance and use bias binding to cover the raw edges.

DONE!! One beautifully neat zipped pouch.
One comment on “Mastering the zipped pouch”
Leave a comment
Recent Comments
| Carol Adams on Masks for Mind Mental Hea… | |
| clairemckenzie2013 on Masks for Mind Mental Hea… | |
| Carol Adams on Masks for Mind Mental Hea… | |
| juliette.gibson on Masks for Mind Mental Hea… | |
| clairemckenzie2013 on Masks for Mind Mental Hea… |

Pingback: Making truly original pieces | IN STiTCHES