Travel laptop case


I’ve an excuse to use my cosy laptop case as I’m going to be travelling for a couple of days. Pleased now that I made it a while ago.
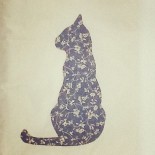
I used a navy, black and grey wool fabric appliquéd with my trademark cat and a black felt interior. I bought this fabric in Japan because I just loved it but have to confess I had a disastrous attempt at making it into a dress. It just did not look right but then there is always something else you can do with a disaster. Have got plenty left over too, possibly for a skirt, or maybe another laptop case or two.
The laptop case is easy to make, and there is a tutorial below. More detailed step by step to follow (don’t seem to have taken pictures of this one – a good enough reason to make another!)
HOW TO MAKE A SLIP IN LAPTOP CASE
You will need a substantial fabric for the outside and something nice and soft and protective for the inside. Both fabrics should be woven so that they don’t stretch although fleece could be used for the inside without too much trouble. Quantities will depend on the size of your device – generally speaking you will need about four times the size of your device (for outer and lining).
Step 1
Make a paper pattern. Draw around your laptop (or iPad, Kindle or whatever you want to protect). Add a good 2cm around three sides and 2.5cm for the opening end. If your item is more than 1cm deep you will need to add a little bit more – if in doubt always add more as it can always be made smaller.
Step 2
Pin your paper pattern to a double piece of the fabric you want to use for the outside and cut out. Do the same with your lining fabric.
Step 3
Using a 1.5cm seam allowance, sew around three sides of your outer fabric, leaving the top edge open. Do the same with the lining fabric but leave an opening of around 10cm on the bottom edge.
Step 4
Check that the ‘sleeves’ are identical in size and check your device fits. Adjust the size as necessary, making sure both sleeves are identical in size.
Step 5
Make the tab. With right sides together sew along the long edge and one short edge of the tab. Turn right side out and press. Add decorative top stitching if desired. Stitch a piece of Velcro to the closed end. Pin the tab in place on the back outside of the outer fabric, pointing downwards.
At this stage, check where the opposite side of the Velcro needs to go and stitch that in place too.
Step 6
With RIGHT SIDES TOGETHER, place the lining inside the outer fabric. Sew all the way around the top edge, sandwiching the tab in place.
Step 7
Turn the whole thing the right way round through the gap you left in the bottom of the lining. Push the lining into the outer casing.
Step 8
Finish off by pressing the top edge, and topstitch if required. Hand sew or machine stitch the gap in the bottom.

Recent Comments